(Note: this was written for the first iteration of Backlight, up to version 1.1, but applies equally to the latest version. Some naming conventions may have changed and the screen shots may be outdated, but the concept is the same.)
Need a little help getting started with Backlight? Well, here are the basics of Backlight templates.
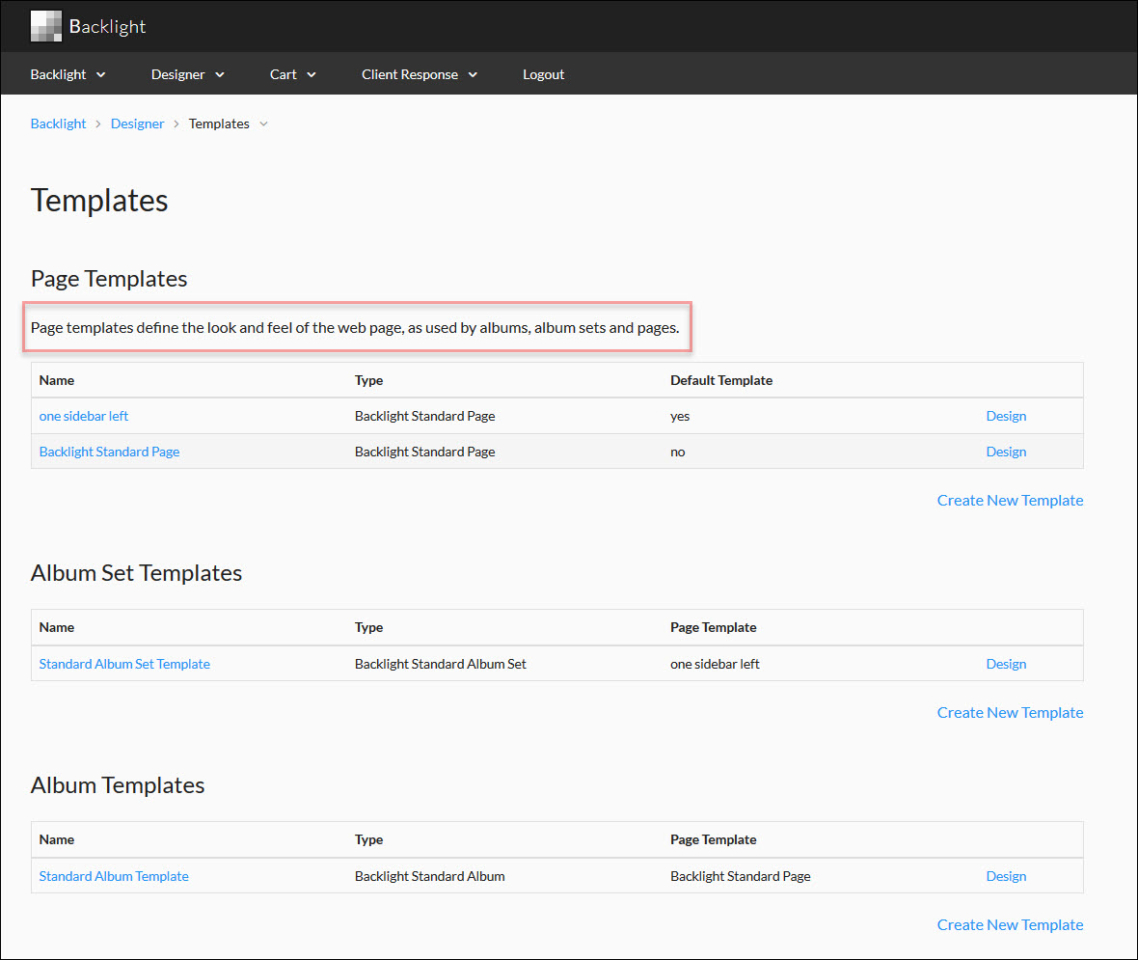
The first thing to know is that Page templates control the overall look of everything you create, be it stand-alone pages (Pages Module), albums, album sets, or WordPress themes (WordPress Module).
Album set templates control the layout of thumbnails as well as album set default page copy. This page copy can be used, or not, in any album set. That's controlled in Lightroom from the album set within Publisher and can also be controlled in the album from Backlight Publisher in Backlight 2 and later.
Album templates control album thumbnail layout, thumbnail and large image sizes, metadata settings, download options, and any default album page copy. Just as with album sets, you can choose to use this page copy in any album.
The album template is also where you choose to use any add-ons, like Fotomoto, Cart (Cart Module), and Client Response (Client Response Module).
In addition, when you create a new album template you have the option of choosing a Backlight Pangolin Album or Pangolin Galleria or Pangolin Theater, if you've purchased the Galleria and Theater add-ons.( Backlight 1.1 and earlier, uses the Okapi module. You may or may not have the Okapi modules installed. This depends on if you've updated from Backlight 1.)
Whenever you create an album set or an album template, you must assign a page template to it. This page template gives your site its consistent look.
The beauty of this template system is that you can create a new page template and in an instant, completely change the look of your site.
Ok, that’s the basic overview.
To get albums to appear on your site, you first need publish one. This will have the side-effect of creating your Galleries page, which will be the home of your new albums and album sets. If you’ve followed the Backlight documentation, you’ve probably already gotten this far. If you haven’t, now would be a good time.
Once you’ve done this, go to your galleries page in your browser.
Since you’ve probably not yet done any designing in the Backlight Designer, your Galleries page and album will look rather plain. This is the default design in Backlight, but you’ll be changing that.
So let’s get to changing that design. Open a new tab in your browser and log into Backlight. Keep your Galleries page in another tab, we’ll be looking at that again soon.
Your pages (the Galleries page and the album you published) are currently using the default Backlight page template. You can either modify that template or create a new one. My suggestion is to create a new one and leave the Standard Page as is.

In the Backlight Designer under Page Templates, click “Create New Template.” Give it a name and under Default Template, change the drop-down to “Yes.” This will make it so that when creating Album Set and Album templates, the page template used will automatically be set to the new one you’re creating. If you don’t want this to be the case, then don’t make it the default page template.
Click “Save” and you’ll be taken in to the Designer.
In the process of designing you'll need to assign a navigation menu, set page widths, hyperlink colors, other Typography settings. Chances are you’ve not created a navigation Menu Set yet. Just use the default for now. You can either modify it later or create a new Menu Set to assign to your page template.
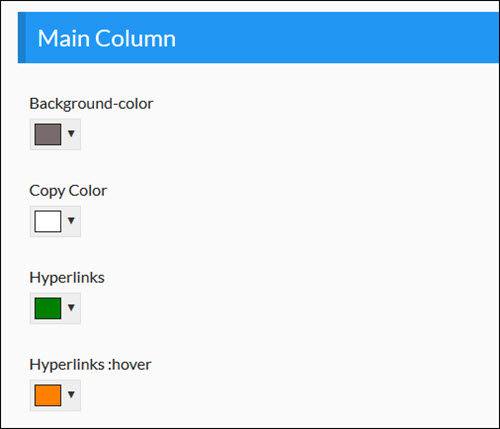
Just to get started, make some changes to things like page background color and page width (under Page Layout) and content Background Color and Copy Color (text color) under the Main Column settings.
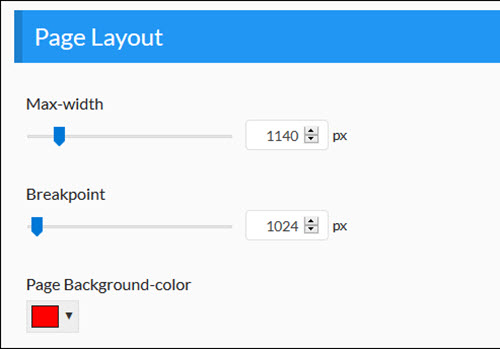
You’ll see a setting called “Negative Space.” When this is set to “ON,” the masthead, navigation, and footer width will be the same as the max-width set in Page Layout. This will be easier to see once you change the setting and view your site. Play with this setting to see if you like it or not.
Save your settings.
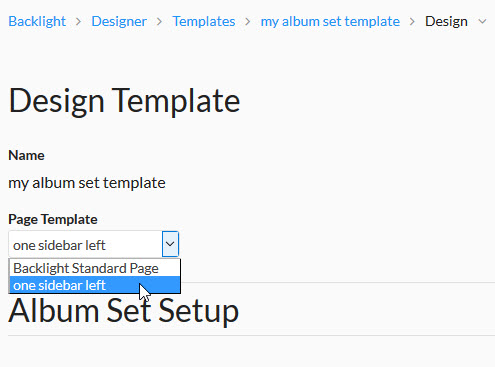
Now create an Album Set template by clicking “Create New Template” in the Album Set Templates” section of the Templates page. Give it a name and click Add. Since you’re just starting out and may want to experiment, give your album set a descriptive name that somewhat describes what the template does. Something like “Standard grid album set” or "Masonry grid album set.”. You don’t have to decide right now, you can always change the name later.
Assign the page template you just made to the new album set template.
Go through the sections in the Album Set designer and make any changes you like. At this point, it doesn’t really matter what they are. The point of this exercise is to get you used to how the template system in Backlight works.
If you want to change the name of the template, go back to the Templates page and click on the name of the template. Then click on Edit Properties.
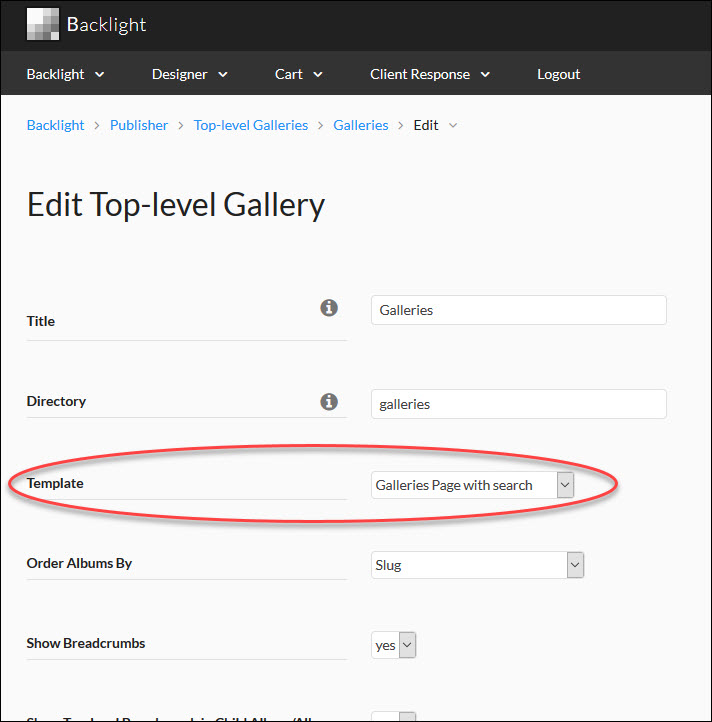
In Backlight > Publisher > Top Level Galleries, click on the title of your top-level gallery. At this point there should only be one. Scroll down to Actions and click on Edit Properties. Assign the album set template you created to Template section.
Now go to the browser tab or window where your Galleries page is displayed and refresh the page. If you made any of the changes above to the page template, you should see them reflected on your Galleries page.
You can now create a new Album template in the same way you created your Album Set template. But instead, let’s try something else. Go to Designer > Templates and scroll down to the Album Templates section. You should have only one template, the Standard Album Template. Click the Design link on the right-hand side of the page. Under the Page Template drop-down, choose the page template you created and then click Save.
Go back to your site's Galleries page and click on the existing album. When the album page opens, the design should be the same as your Galleries page.
Now go back to Backlight > Designer > Templates and click on Design to the right of the Page Template you created earlier. Go to the Main Column section and change the background color and save.
Go back to the tab that’s displaying your album page and refresh. The content Background color should change.
This ability to make a change and instantly see the results makes it pretty easy to learn what all the controls in Backlight can do.
There’s even a way to set pages you’re viewing to automatically refresh. When you’re logged into Backlight and you’re viewing your site in another window or tab of the same browser, you’ll find a refresh icon that looks like this in the footer of the page. Click on this. Now, as soon as you make a change in Backlight, that change will show up on the page. If you have two monitors, place your site in one and the Backlight interface in another. If you have only one monitor, resize the browser windows so that they both fit side by side on the screen. The Backlight dashboard is responsive and you’ll have full access to all controls.
When you’re back in Lightroom and ready to publish more albums, you'll find that your templates are already there ready to use in Publisher.
To reiterate: Page templates control the look of album and album set templates. Album and album set templates are used by Publisher to publish your albums and album sets.
If you have the Pages module and are creating stand-alone pages for an entire site, these pages also need to be assigned a page template.
Hidden basics
There are a couple of “gotchas” that always seem to trip up new users, and they have to do with your Galleries page, or rather, the top-level galleries page.
Go to Backlight > Publisher > Top-level Galleries. Click on the name of your Galleries page and then click Edit Properties. Here you’ll be able to control what happens on your Galleries page, and even though this section was mentioned earlier, I feel it’s worth going over again.
Things you can control include:
- The page Title. Don’t like the word "Galleries" in your breadcrumbs? Name it something else.
- Template: choose the album set template that will style the Galleries page.
- Set your album order preference.
- Choose to show or hide breadcrumbs.
- Edit the copy of your Galleries page.
- Choose to place the Page Copy above, below, or to replace the existing album set page copy (which you created when you created the album set template)
- Edit and position and tray copy you want to use.
Some of these settings have informational icons . Be sure to hover your mouse over these.
Ok, that's enough for now. Play around creating new page templates and assigning them to album and album set templates. If you don't want to clog up your main site with a bunch of testing templates, my suggestion is to set up another installation of Backlight in either a sub-domain or sub-folder and play to your heart's content without worrying about messing up your main site.
And if you come up with a design you like in your test environment, it's easy to export your Backlight templates and then import them into your production site. Just go to the Templates page, click on the name of your template, and click "Export Template." Save your template file where you can find it later.
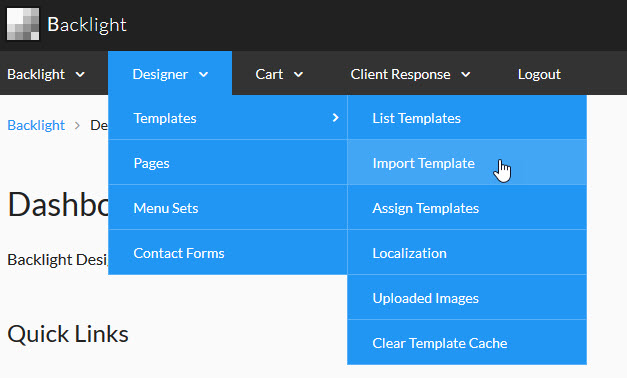
To import templates, go to Designer > Templates > Import Template


Hello ROB.
Thank s for all your job to understand the many fonction “BACKLIGHT” I hope when i finish testing many fonction that i create also tutorial in french for other photographer.
Have you think to create tutorial video on youtube. I have find only two video from
Matthew Campagna. For me it’s the best way to explain many think.
Awhile back I created a tutorial on setting up CE4 in a WAMP environment. I have a list of Backlight tutorials I’d like to make. It’s just a matter of finding the time. They’re more time consuming to do than one would expect. 🙂